Bring (something) into existence.

"She created a thirty-acre lake"

synonyms:

Generate, produce, design, make, fabricate, fashion, manufacture, build, construct.

Showing posts with label Group Projects. Show all posts

Thursday, 14 May 2015

Project Postmortem

The wondering Lands of Alice


This project was creating a level with a team of six, the theme was Alice in wonder land and we had to reference the source materials given to us by the British library. We had to develop our own style guide and constraints to fit the engine. It was Suggested that we use the side scroller element of UE4 to help us with engine.

This project I really feel I pushed to learn about and take the reigns on the things I want to develop. These skills included: Art Direction, texture artist, 2D Level concepting and over painting, 3D level concepting, 2d character concepting, character art direction, model reviewing, texture reviewing, unwrap reviewing, packing and creating, particle reviewing and assisting, Engine texture assistance. My roles have been based on over seeing parts and keeping textures and styles consistent in such a complicated level.

Most of my contribution to the level has been texturing and concepting at the start. Some of it has been correcting models, redoing unwraps and art direction for things like size and style of particle effects. My major jobs where art direction, especially with texturing and colours. My secondary role in this was overseeing character creation, like denzils mushroom and cat. When it came to modeling I mostly took first pass models from others so they could work on engine and I could fill in for our group lack of understanding when it came to engine. This meant I did a lot of re-unwrapping and re-topologysing. However it worked out really well as the quality of texture is high because I had enough time on it, but the texturing is also consistent because while we all did some mine was around 70% of the level.

Because we where assigned groups for 6 to work with for 3 months we had a lot of team meetings to start with, this allowed us to get to know each other and what we wanted to learn in the project. With this the first stage of development began, we decoded the brief and tried to sum up the ideas that we all had floating in our heads as individuals. This was via a white board to start with. It allowed us to see what ideas linked, what ideas people had the same and what we could strike off the mass list of things we’d like to do. Once we narrowed it down we all made mood boards and storyboards to match the consensus of ideas. It soon became apparent that the roles given to us didn't suit our skills so we divided labour more efficiently to suit what people where good at.

For instance i'm not a strong environment conceptor so everyone pulled together to help and we all worked hard together to visualize the story, the layout, the blueprints needed and the overall style. Next time I think I will really practice my environment work because it is very lacking, My biggest issue was working on setting from scratch, as colouring them didn't pose the same issues.

I started off with story boards (shown below).


Refined my first idea for a section of level layout.


Rough shorter story board after talking to the group.

  
It soon became apparent that as a group we had leaned towards underground. Once we agreed on the shorter board above we started to look into style for textures and level assets. This involved white boxing and paint overs but also traditional concepting and style guides.

One of my first style mood boards


One of my first mock ups of how layers of planes could create backgrounds like in theatre.


The style guide I came up with for how paper, hand painted and 3D could all fit together, looking into modified books, theatre sets and hand painted 3D assets.


One of my first ideas for how the planes and realism could fit together.
 

Looking further into the style above but with more colour and lighting.


One of the last paint overs of blockouts, this time focusing on colour and lighting further. This was something I coloured but didn’t sketch. As I mentioned people worked to their strengths so I worked on colour and art direction with amber at this stage. Looking back really I should have been able to take a stronger lead on this but I'm not convinced that would have been more successful.

As I worked on so much of the paint overs and art direction I also created this level layout design from the block out and some paintovers. Naturally a lot of this ended up needing modifying and sketching over to fit but it gave us a solid colour, style and size reference for modelling the level, not to mention asset list and working out what blueprints or particle effects we wanted. 


Once we had this all together many people started modeling from the white box, however because of the plane aspect of our level and how me and amber worked as a pair to get one small part working to check style, I worked on texture right from the word go.

The first set of textures and a paint over using these planes to show where they should go


These are examples of how I worked with people using engine to show how models, placement. In hindsight I think there should have been more of this kind of communication throughout the project 


Before                         After

A lot of my work after concepting was either continuing with making textures for planes we knew would be used in game, like the backgrounds and trees, or correcting textures (as above).

Weeks 5 -
 Easter
Examples of textures


Here is one of the many sheets I put together using the books from the British Libraries references and our own libraries books. The orange bit would glow in engine giving it the look of dusk without creating a too dimly lit level.
I think that textures are one of the really good things about my work on this project. I've worked with scanned materials from our library here at DMU along with hand painting textures and I feel they all fit together well which isn't that easy given the way they are completely different styles normally

Example of my texture setup I did in engine:
The crystals I created by looking at the best way to have a translucent texture but still retain an amount of PBR. This wasn’t easy but by changing the setting in the material as well as using specularity I got the right look for crystals.

The cat that glows a bit to help visibility in its dark environment.

Although I learn more about engine texturing and got quicker I competly let myself down by not doing roughness and metalness and normal maps and not setting them up. We did this so I had more time to fix things and paint textures, which some members where very weak at doing, but I didn't learn enough about engine on this project because of it and I feel like I will have to counteract this by doing a lot of PBR work over summer to learn how to do it quick enough to spend longer on an albedo.

 So, after all that, this is how it came out!


I think a lot of the work I did shows up because it’s texturing but I do feel like my input was not as much as it could have been for some areas like modelling. I’m also very aware that all the effort I put into rewrapping and fixing silly mistakes like nested verts and bad topology went completely unnoticed by the group due to the nature of correcting someone’s work that’s in progress rather than giving it back in a spot the difference like fashion. However part of me is pleased because even though I wasn’t directly modelling the amount of correcting has meant my skills are still getting used and I’m still an efficient modeller in 3DS Max. I feel that for the most part my skills in art direction and texturing have come along so far that the pain of group work has very much been worth it.

Five Things to work on:
texturing speed, working on own maps whole way through, critical paint-overs throughout project, understanding more in engine, my time management.

Five Things that where a success:
My hand painted textures, helping unwrapping, art direction improvements, helping retopologize models, working together in a way that played to our personal strengths.

One thing learnt:
How to use matinee to animate in engine!

Wednesday, 19 November 2014

Week 4

The Film Room Post Mortem part 2

Once we got the ok, it was time to go into overdrive, turn it up to 11 and burn some midnight oil. Although if I was to redo this project I would have started once we had a film chosen and probably taken advice from tutors rather than relied on the dragons den method we were given, as we spent far too long deciding and not enough time working.

But then you never know what issues a project will throw at you, learning is a mixture of failing and picking up the usable pieces for next time and successes where you find a working method and roll with it.

Organisation would be key in this project, something we didn’t seem to realise until week 2. However once it was introduced we used many methods of keeping track of each other, our work and the group internal deadlines.

We used methods like: mood boarding the scene for assets, colour pallets, the waterfall timetable and an editable schedule to help us all add in parts that we missed and crack the whip on each other.


Now it was time to concept for my assets. A lot of them were front on or difficult to see in the view of the tent we chose. So for the trophies, the part I couldn’t see as well, I did the most iteration. In the end I used line orthographics to obtain the shape I wanted. I think my concepts are poor and if I had gone back I would have started them earlier so I had more time on them.


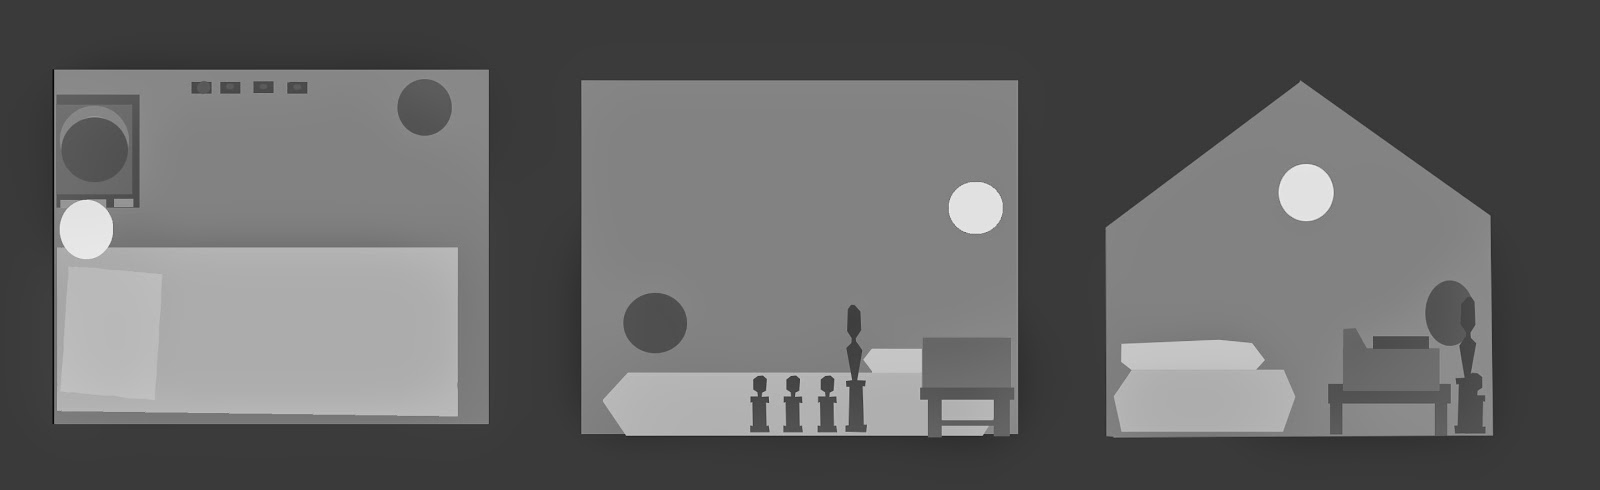
orthographics


Because of my concepts being poor, I decided to use the block mesh we had made, to create simple, visual, orthographics. These were used for presenting and helping understand the paper models proportions, without having too much topology in the way of the asset you are trying to measure.

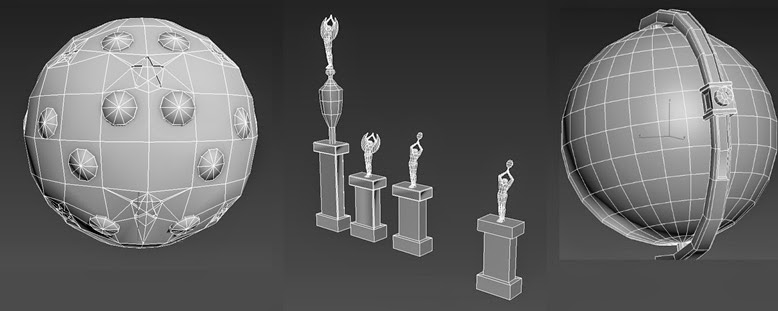
From concept to model, the time to use 3DS Max had come. And I was ready. Although I’m happy with my models, there are parts looking back that I would change to fit the tent better that are a little off in engine. The candle holder for instance is correct in max, but in engine the camera used stretches the model too wide. Also because of my working view the globes holder is both too wide and the turner is too far down the holder.

Once I had unwrapped and textured it was a little too late to fix this because it was lit and set up in engine ready for presentation. There will always be an argument for if I had a bit more time. However I really feel that if I had of used the time I had differently, spent more time on concepting and getting feedback, then these where issues that could have been ironed out of our scene.

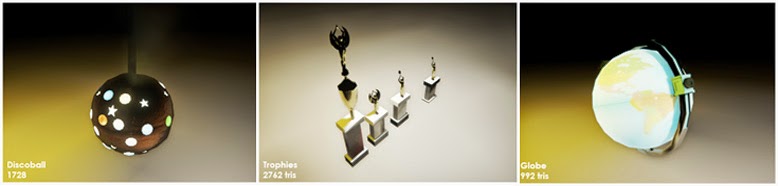
Models in engine

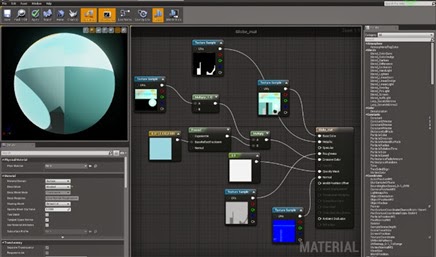
using masks for emissives

Complicated textures
Texturing was reasonably simple, but I was using a new map, an emissive map, which is a map that masks out the non-glowing parts of the texture so only the correct parts glow. This was simple but plugging it in, getting it to look right was another matter.

Introducing Freddy to complicated texture blueprints in engine was also not a simple task, but we got through and I now understand a lot more about PBR.


Least we forget the paper model, a hallowed construct of paper and love. This was something that we put a lot of effort into, although not much time and it somehow came out the other side looking pretty good.

I love it because it’s cute and it was a lot of fun to do together. However It was really successful too, it matches the scene well and we faced similar camera issues with the physical model as we did with the engine one. Because of the focal point of the globe, the lens wants to focus on it or the back, and not both. 

To create the photo of our model I took it on my DSLR, so I could fiddle around with differential depth and then composited two successful shots into one.


Overall I’m chuffed about how well we worked as a group, I’ve learned an incredible amount about engine, group work and most importantly I’ve taken on all these mistakes and learnt from them. I may have changed parts with time, I may have not produced my best work ever but I learned so much and I’m at uni to learn.


There is no failure in mistakes, failure is not learning from them.

Saturday, 15 November 2014

Week 3

The Film Room Post Mortem part 1

Now the Project is over, I can present the film room project, a deadly viper assassination squad production.

Our group started by looking into films and rooms we liked, many were colourful, high contrast and busy rooms. We soon realised most would be very challenging.
We created a mood board of the rooms we liked, the rooms we thought were reasonable and the films that had good art direction for us to study.


However it became clear after our first pitch that the rooms we had chosen may have been too busy and too complicated for the short deadline we had.

Our very first moodboard


My revisited moodboard
Our next pitch was in 1 week so we had to get working quickly to find the room that would be colourful, have good lighting and also be simple enough to model in just over 2 weeks!
To get the ball rolling I made the above mood board of films and rooms I liked. I then set off the rest of my group to do the same and cracked the whip so we could decide and get some concepts and white boxing done for our second pitch.

Speed runner
Broken Embraces
My paintovers

We all did over-paints of scenes to decide which were the most effective without people and which still had really good composition after removing actors.

I started with tonal studies to find the scenes with the best lighting and composition, it really helped find the rooms that were boring without colour.

I really like the staircase but we all decided the tent was the most visually appealing to all of the team. 


This was our final mood-board for our second pitch, it shows the back-up rooms including our final choice, the tent from The Royal Tennebaums.

Monday, 3 November 2014

Week 1

Farewells and Fresh starts

Grouping together


After a long summer of merriment and seeing family I'm back in Leicester continuing my journey that is Game Art. My first week had been such a mixed affair with the final farewell of first year and news that diffuse and specular maps have been superseded by albedo, metalness and roughness. I'm happy to see new changes and learn about how the industry adapts. I feel it will make me more capable of adapting in industry when these changes roll around again because I have dealt with them while still learning.

Here's to fresh starts, I've even set myself a daily digital painting challenge(even if it's only an hour a day). Seeing the improvement in my visual studies is really motivating as I'm becoming more of an artist by the day.


Not to mention albedo maps don't need shadows baking in, which is great, because I didn't understand that part very well anyway. However that is not to say I haven't had a little struggle getting my head around U4 and the new material maps. Hopefully as the next few weeks go by with a little practice and a little 3rd year nudge of help I'll have the new system cracked.


My first week's work has been interesting, fun and engaging but mostly interesting. I've had two group projects this past week; as my main aspiration is to become an art director I have tried to enthuse, motivate and get the best work out of my colleagues as possible. 

Group work


PBR is love PBR is life

I think my 3D group work could have been more organised but my peers looked to me for advice on what style, scale and job they should do. I noticed they asked me to check things for them even though I didn't ask to have things to go through me. I think they felt comfortable with me taking the reins and organizing our work. I'm really encouraged by this because it means that I'm already on my way to learning the key skills needed to manage a team.

I think it's really important as a team leader to not be over aggressive with your methods; people should be able to bounce ideas off of each other and feel like they can contribute to the project. The best way of leading isn't always to get on people's cases but to be passive to the work flow of an artist, encourage the best work out of them as a working group, rather than limiting them to your own thoughts.

This more passive leadership is happening with my visual studies film still group work. There are strong characters in my group (including myself) with all these great ideas already. There is little point in narrowing their ideas with what I think, ultimately that could take out some of the passion for the project. Instead we have lots of bounce meetings where everyone gets to pitch their ideas and I really feel our current idea is so much stronger for this.


Revised Moodboard
At first we had thought about Utopia or Kill Bill. Everyone was happy with these but after a talk with the lecturers, we've kept looking and we've gone for the tent from The Royal Tenenbaums. 


My over paint of our scene

As you can see it's quirky, simple, quaint, full of colour and interesting lighting.


Here's for another great year.

Here's to farewells and fresh starts!