Bring (something) into existence.

"She created a thirty-acre lake"

synonyms:

Generate, produce, design, make, fabricate, fashion, manufacture, build, construct.

Wednesday 24 December 2014

Week 9

Concepting and Modeling in sync


Final idea tonal 
final idea tonal

I wanted to use the fact that I had already got two strong ideas completed early on to my advantage, For this project i would model both characters as my stretch goal.

Ideas for patterns

Ideas for patterns

Colour concepts
Colour concepts


It wasn't long before i had the first attempts underway but i quickly found that the shape of a bell, or in this case poncho is not an easy shape to pull out of a cube. This led me to try many other shapes to find the easiest way of forming the ponchos for my two characters. In the end it turned out I will forever be the box modeler I started off as. In order to have nice quaded and looping topology, starting with the good old trusty box, is the only way I could make them.

Once the great poncho shape debate of 2014 was over it was time to move on with my life... I mean models and tweak the original designs to fit a little better in 3D.

This week has now ended in unwrap city, but texturing them is next weeks ordeal, good luck next weeks me...

Saturday 13 December 2014

Week 8

Character Project


I start this project on a high. My seminar on the dichotomous duo was really interesting; the part that was most informative was when we wrote an alphabet of words on a board as a contest. Then we had to find a dichotomy with one of these words and make a Venn diagram.


I chose sour and sweet as I had this image of an old divorced crazy lady and a little cute girl on her paper round, having a little bond over cats... Because cats are great. However because I felt that this could go into a colour palette and theme too similar to my sentry gun I changed this to leather and lace.

My investigation into a theme has led me down a tribal route. Looking into Peruvian and Mexican culture, high fashion and illustrative styles I could base my characters off. I found someone called Yao Yao and it's great, i'm in love with the skinny leg bulbous body look. I'm genuinely excited to use their work in a style guide and see how it converts into 3D.


It's funny how solid ideas repeat, even if it wasn't intended. I looked at journey because the more I looked under my theme and style the more it popped up. Low and behold the strongest of my silhouettes where visually similar to the shapes in journey. It may have been unintended but it does show how there is a defined difference between ripping off something and riffing off something. By using similar source imaginary I came to the same conclusion, and rather then panic and wonder what to do, I decided that this was great. I had found a style, a theme, made strong choices and produced strong designs. The fact that they are akin to something often seen as very visually strong can only be positive. This was the birth of Journey 2: Electric boogaloo, with horns.

The journey through game art continues.

Wednesday 3 December 2014

Week 7

Sentry Gun Overview

This was a fairly simple project, the hardest part was taking all my melting pot ideas into one gun, I feel it worked out well in the end. The first part was research and I picked pastel goth and diesel punk as my themes. To make the work I took mechanical but rounded shapes, made a bash kit and started working. The outcome was suitably diesel fuelled and so I made the colours, details and feel for the turret more pastel goth. The whole thing turned out a lot better than I thought it would.
Next I moved on to modelling, this wasn’t hard but not as difficult as I had thought the blimp like back end would be ethier so all good there. The unwrap could have been better, I didn’t know how I was going to recreate my ideas so there are parts I would change. Eg: the separated ID’s could have left more space for my other parts and got more space themselves, however as is they could share the same roughness maps.

The poster i made for the graphic side of project.
Engine was a lot of fun and experimenting, especially with textures and my new toy the Lerp node.

I’m really pleased with most the topology on this project, I tried to get it to flow well and use my large 5000 tri budget efficiently all across the model. Some of the wires look similar and would share texture space, but I didn’t want smearing so I had to lay the over each other rather than reassign verts as I normally would.


My projectile was an eye ball, I’m really happy with how the normal map pumps up the veins, and it’s also really well fitted for my gun.

Using blue Prints to get the double barrel working.


Learning about lerps, I love lerps, I used several on the glass to give it hue and opacity (glass material above). Lerps are also what gives the gun a purple pearlesance and that’s perfect for the look of my turret. I feel it looks less toy like because of the lerps.

I also did a little paint over to show what I would change, in this case I would make the purple glow out the back reflect off the metal more.


I’ve really love learning about texture map and how I can use I’Ds in max to swap out and become engine textures, which are not part of my texture budget, so that’s really useful. I also love the way that Lerps work and I may have gone overboard with them. However I think if I went back once again my concepts weren't up to scratch and I should have shown my progression more. I got some feedback that my pivot was too thin (oddly balanced I think they meant) but didn’t have time to re unwrap and change that so that was a shame. I looked at my idea and changed parts and did a lot of working out with how I would create this gun in 3D, but I seem to not have shown these processes anywhere, nor have I shown how I went back into the albedo and added more details and scratches and decals. Which is a shame because it was a part of how this developed. Overall I’m happy with my result and it’s a project that I would like to revisit and add more too, eg: animated eyeballs flowing through the tubes like they were meant to, but I couldn't work out in time.


In engine shots of my pastel punk diesel gun

Tuesday 2 December 2014

Week 6

Back on the Grind Stone

Modelling is love modelling is life


3DS Max is the main tool in my software belt as a 3D modeller and my relationship with this software has strengthened as the course has gone on. But none could have anticipated the struggles of low poly bat wings.

The Model


Nevertheless I have prevailed and me and Max have created my turret and it looks just like the silhouette, complete with cage pivot. I'm really happy with how the pivot translated into 3D.

As it was modelled I felt it was time to test my gun in Unreal 4; in hindsight I should have had it unwrapped but I was too excited. This showed me that my favourite part, the caged pivot, looks odd as a pivot when the gun moves. (Not to mention the 30 times I tried importing the mesh only to have the gun parts move in 3 different directions.)
My Topology

My attempts to make it look more suitable have failed, but I kinda like it looking off. The gun itself is a little weird and wonderful and maybe the insane pivot is just an aspect of that.

The best part of all this is the blueprint learning that has occurred through trial and error. It may not be an opinion shared but trial and error makes me clever. Every project I have a struggle with I learn and can apply so much more for my next assignment. 

Friday 28 November 2014

Week 5

Individual Projects Begin

Sentry Guns, Iteration for the Nation 

A new project begins, the sentry turret. This time our brief is to design, model and transfer to engine a sentry gun. The blueprints and animation is set up. All we need to do is import and replace... or so we thought. (Freddy and the pivots from hell is another story).

We began by making a good old fashioned pinboard: http://uk.pinterest.com/cantondmuga/gunned-down/

Oh Pintrest the way you make my research easy and accessible makes my heart skip. My chosen theme was pastel goth and diesel punk. My idea was to create a diesel punk silhouette, then theme and mix in the pastel elements. 


From here we created reference boards and from these our first silhouettes. My first silhouettes were made from a bash kit created from my mood board, which was really good fun and a technique I hadn't used before. I could have iterated until the cows came home nothing was stopping me. However when I got to 50 reason stopped me, it was time for feedback


From the favorite designs of each person I asked, I produced tonal outcomes and started to develop them into something more pastel goth. Needless to say, not much time was spent on this after all those first silhouettes. At least i'm happy with the sheet and feel a lean towards which is the strongest design. Before I knew it we were knee deep in the turret project and I was on to colour sheets.
Tonal Studies, how will these be 3D

Colour Sheet

Final Design, and I'm very excited 


Next time on Freddy does game art, 3DS max and the day of the round shapes.

Wednesday 19 November 2014

Week 4

The Film Room Post Mortem part 2

Once we got the ok, it was time to go into overdrive, turn it up to 11 and burn some midnight oil. Although if I was to redo this project I would have started once we had a film chosen and probably taken advice from tutors rather than relied on the dragons den method we were given, as we spent far too long deciding and not enough time working.

But then you never know what issues a project will throw at you, learning is a mixture of failing and picking up the usable pieces for next time and successes where you find a working method and roll with it.

Organisation would be key in this project, something we didn’t seem to realise until week 2. However once it was introduced we used many methods of keeping track of each other, our work and the group internal deadlines.

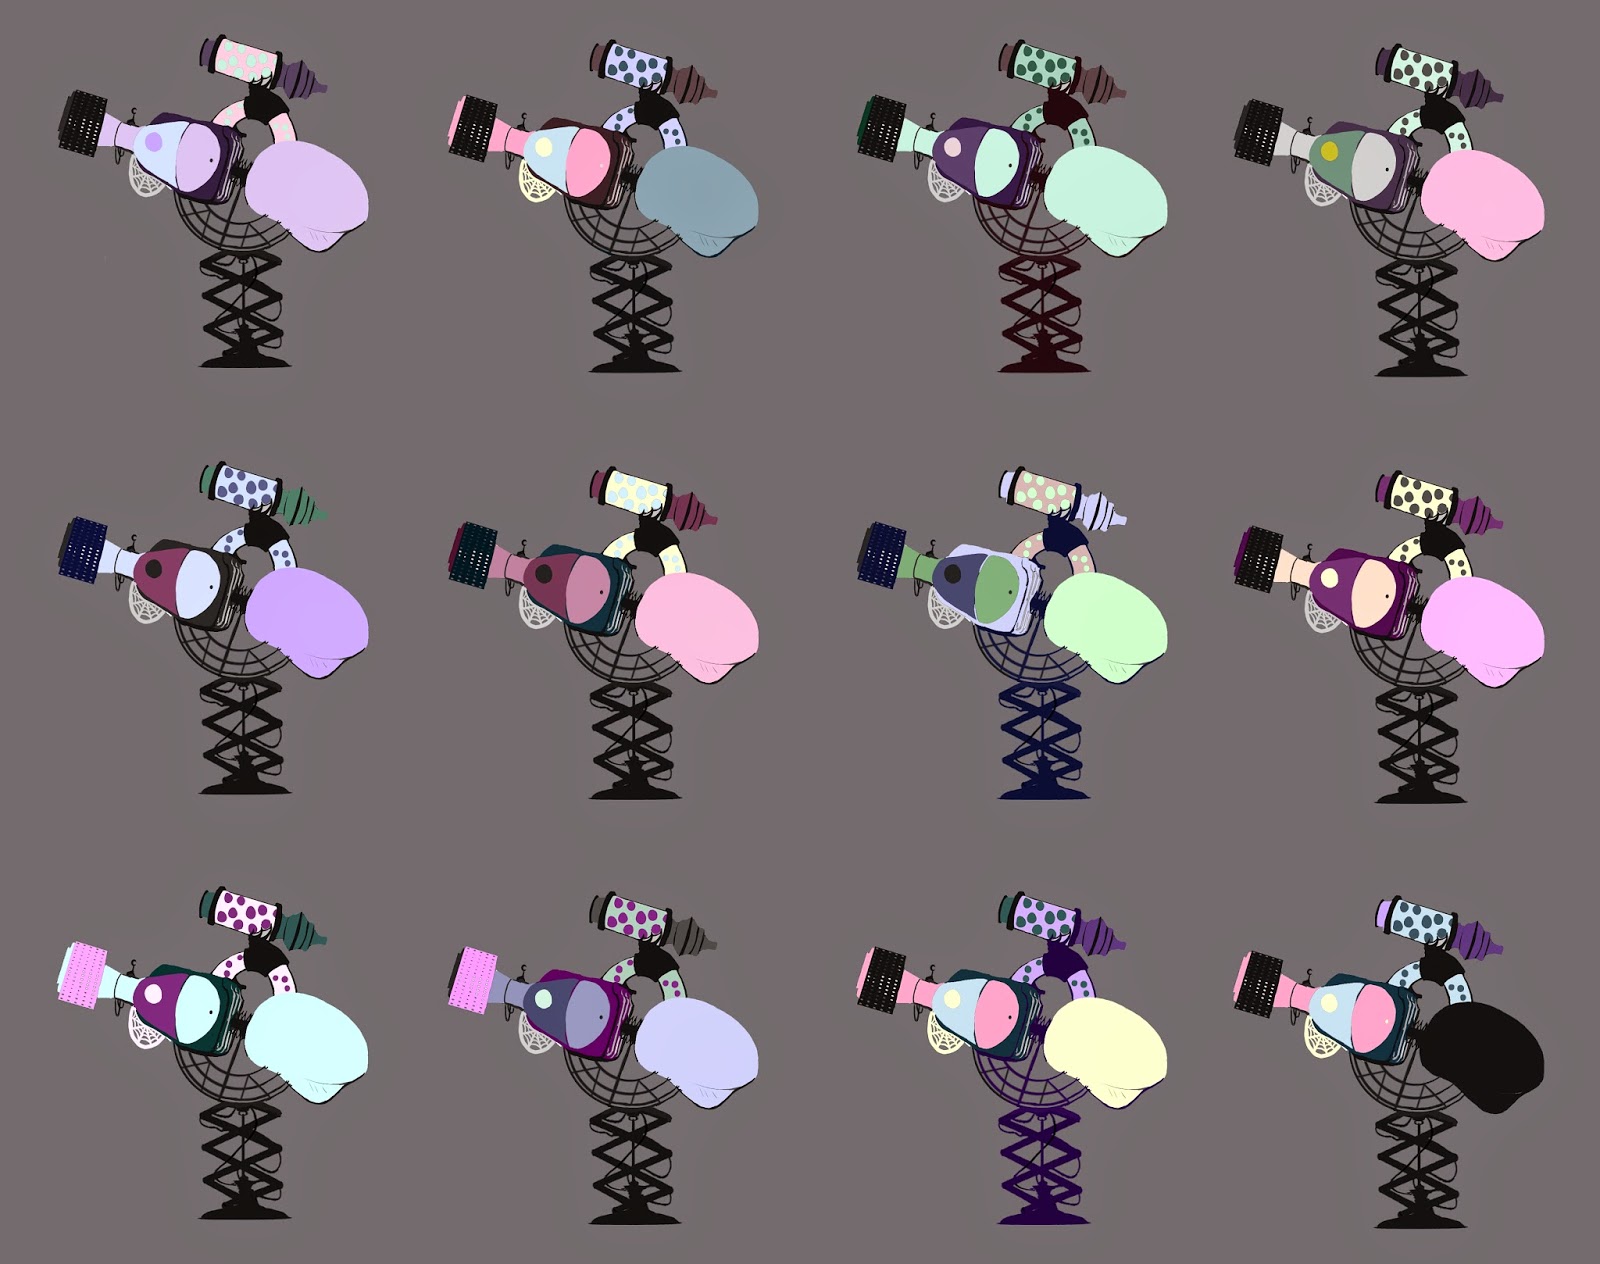
We used methods like: mood boarding the scene for assets, colour pallets, the waterfall timetable and an editable schedule to help us all add in parts that we missed and crack the whip on each other.


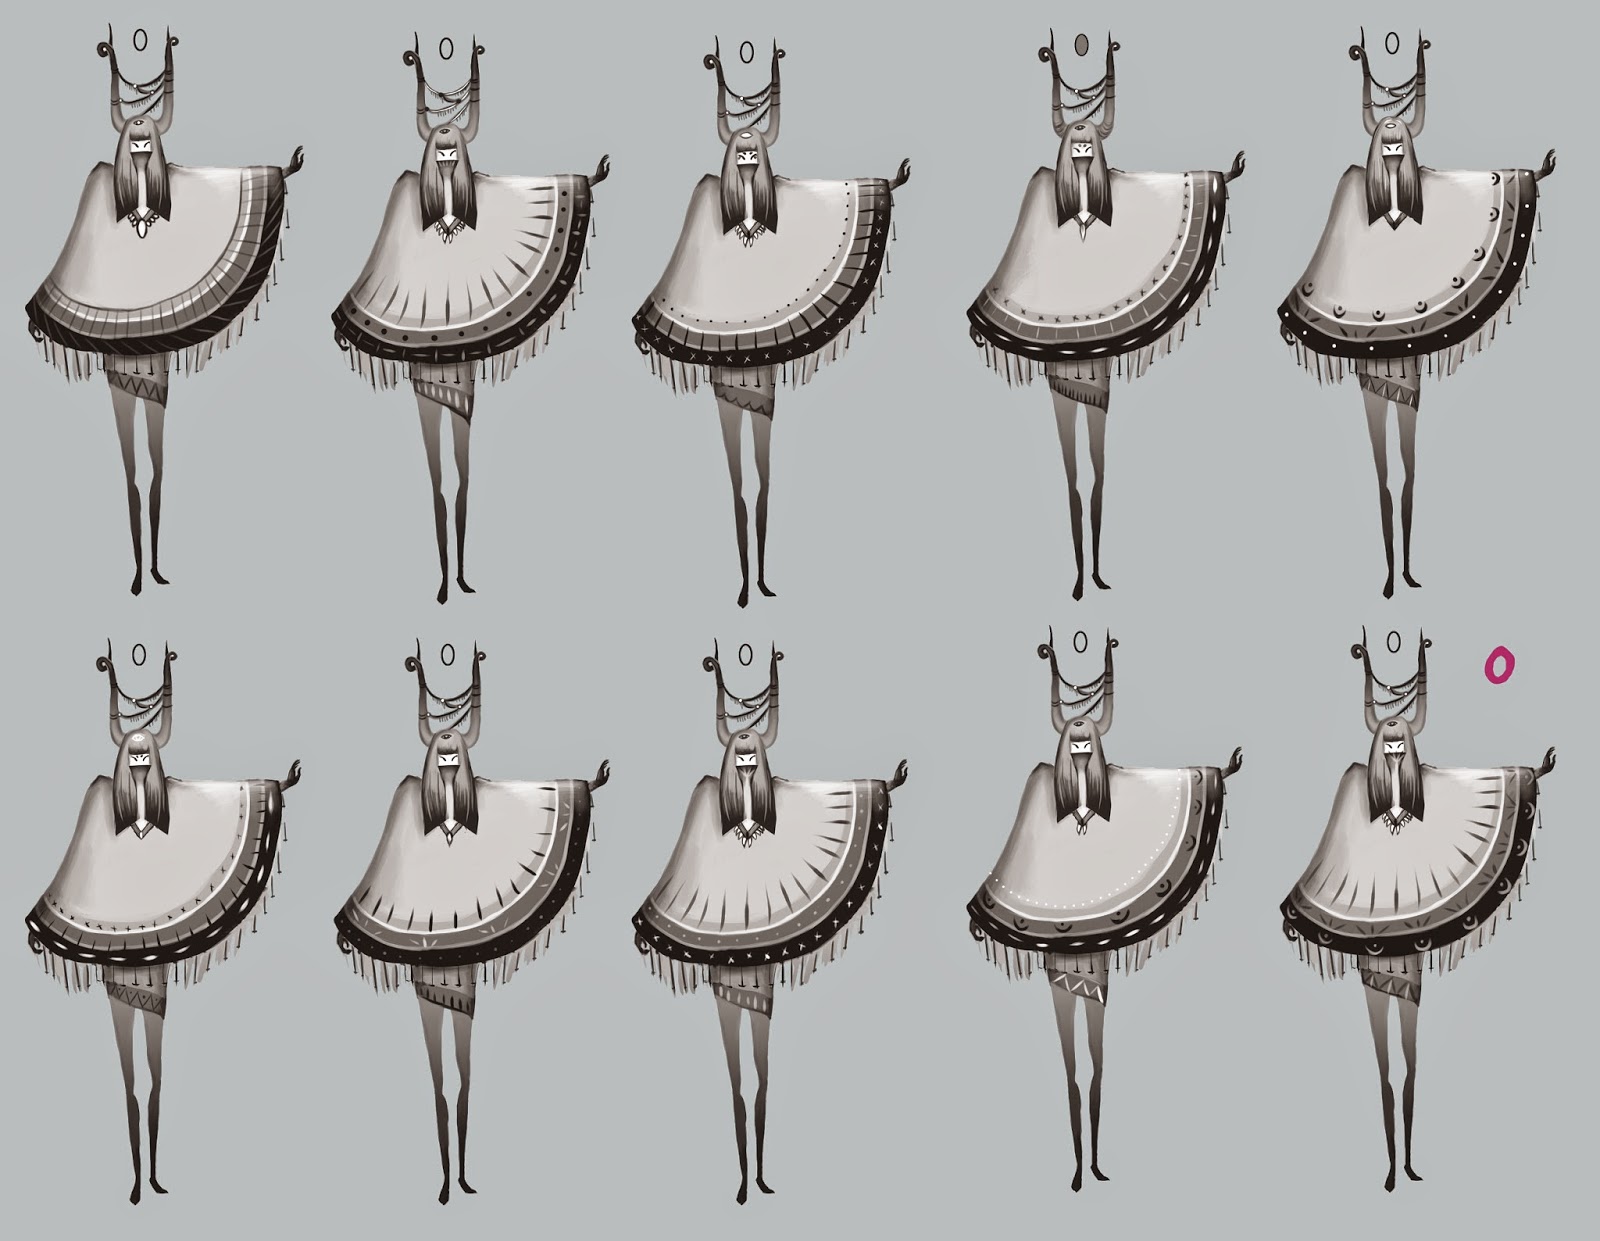
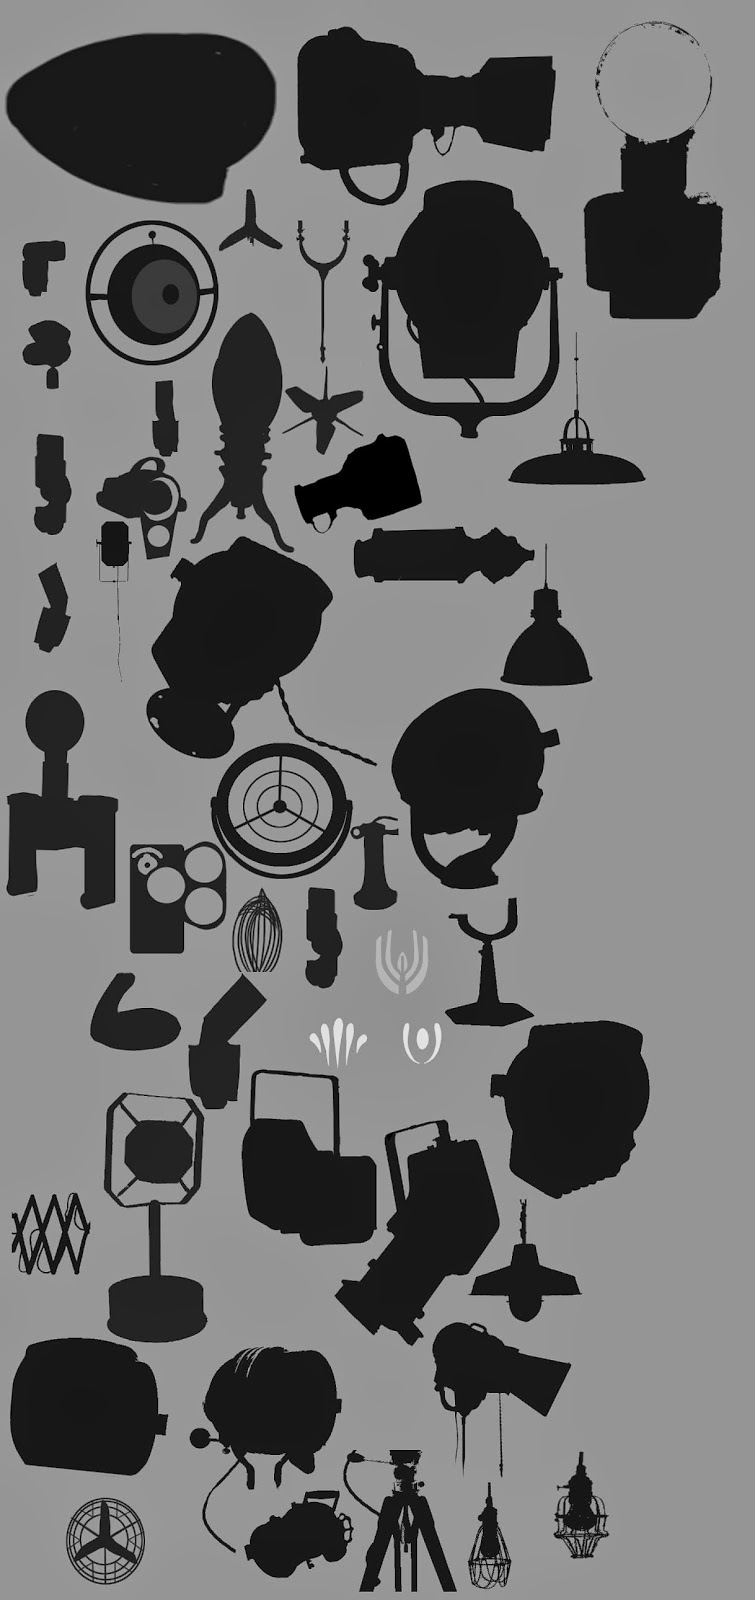
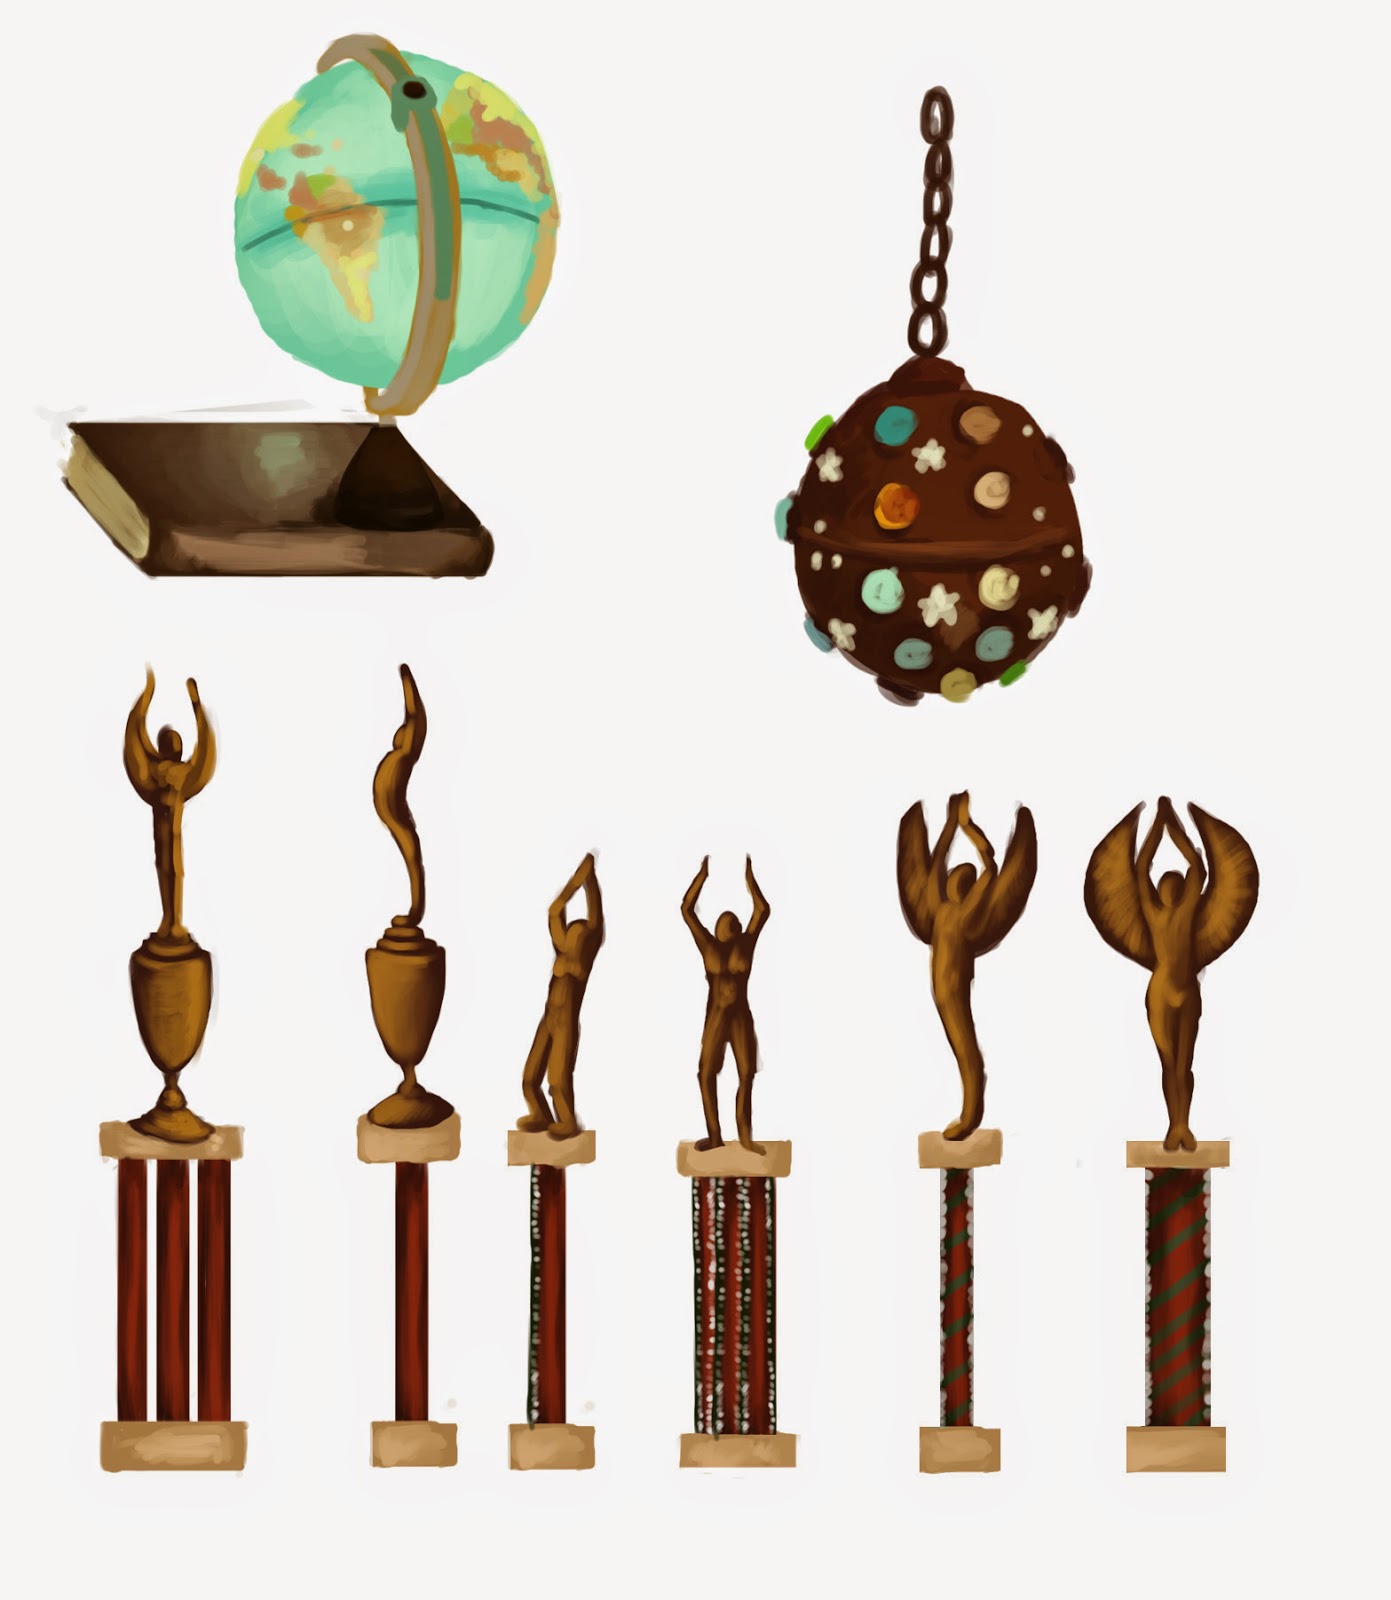
Now it was time to concept for my assets. A lot of them were front on or difficult to see in the view of the tent we chose. So for the trophies, the part I couldn’t see as well, I did the most iteration. In the end I used line orthographics to obtain the shape I wanted. I think my concepts are poor and if I had gone back I would have started them earlier so I had more time on them.


orthographics


Because of my concepts being poor, I decided to use the block mesh we had made, to create simple, visual, orthographics. These were used for presenting and helping understand the paper models proportions, without having too much topology in the way of the asset you are trying to measure.

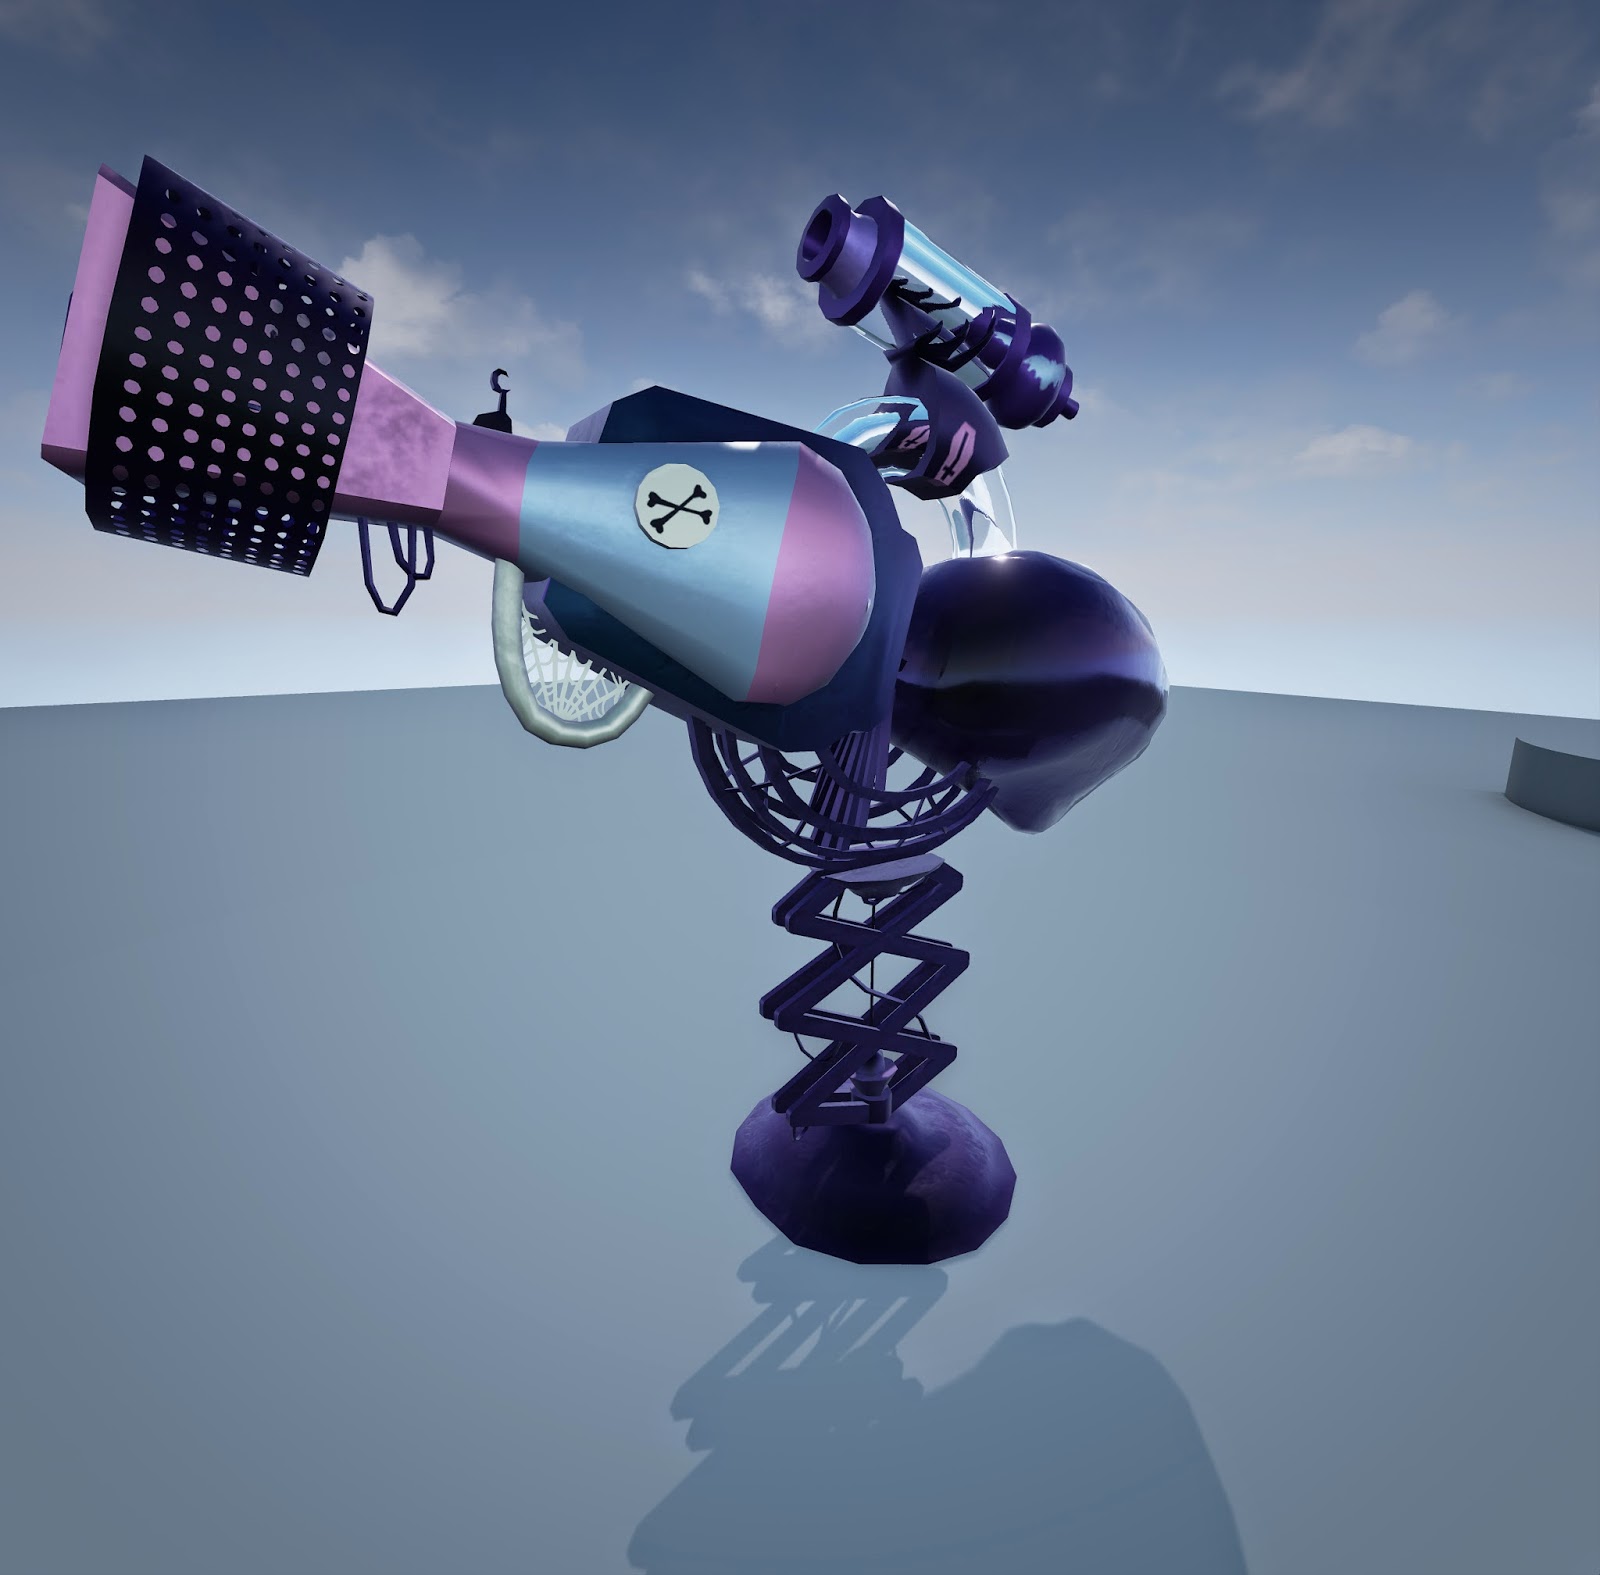
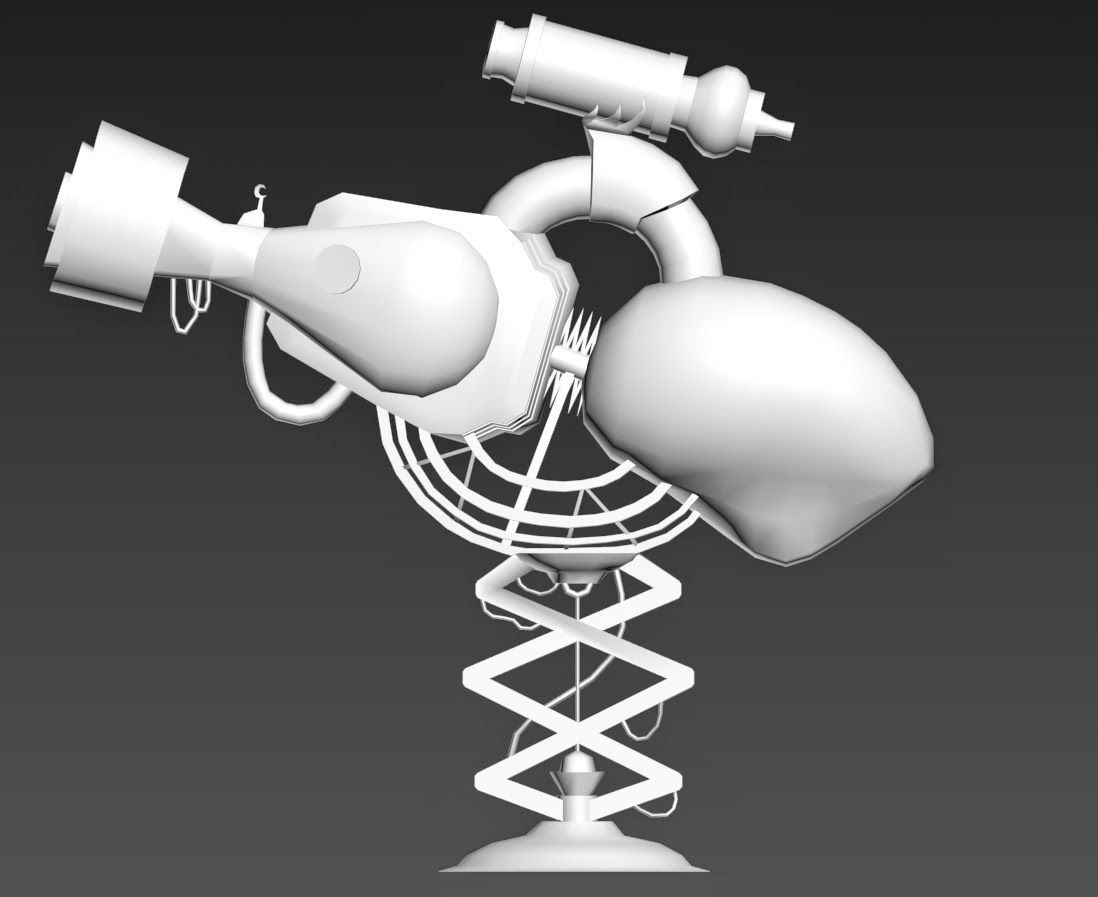
From concept to model, the time to use 3DS Max had come. And I was ready. Although I’m happy with my models, there are parts looking back that I would change to fit the tent better that are a little off in engine. The candle holder for instance is correct in max, but in engine the camera used stretches the model too wide. Also because of my working view the globes holder is both too wide and the turner is too far down the holder.

Once I had unwrapped and textured it was a little too late to fix this because it was lit and set up in engine ready for presentation. There will always be an argument for if I had a bit more time. However I really feel that if I had of used the time I had differently, spent more time on concepting and getting feedback, then these where issues that could have been ironed out of our scene.

Models in engine

using masks for emissives

Complicated textures
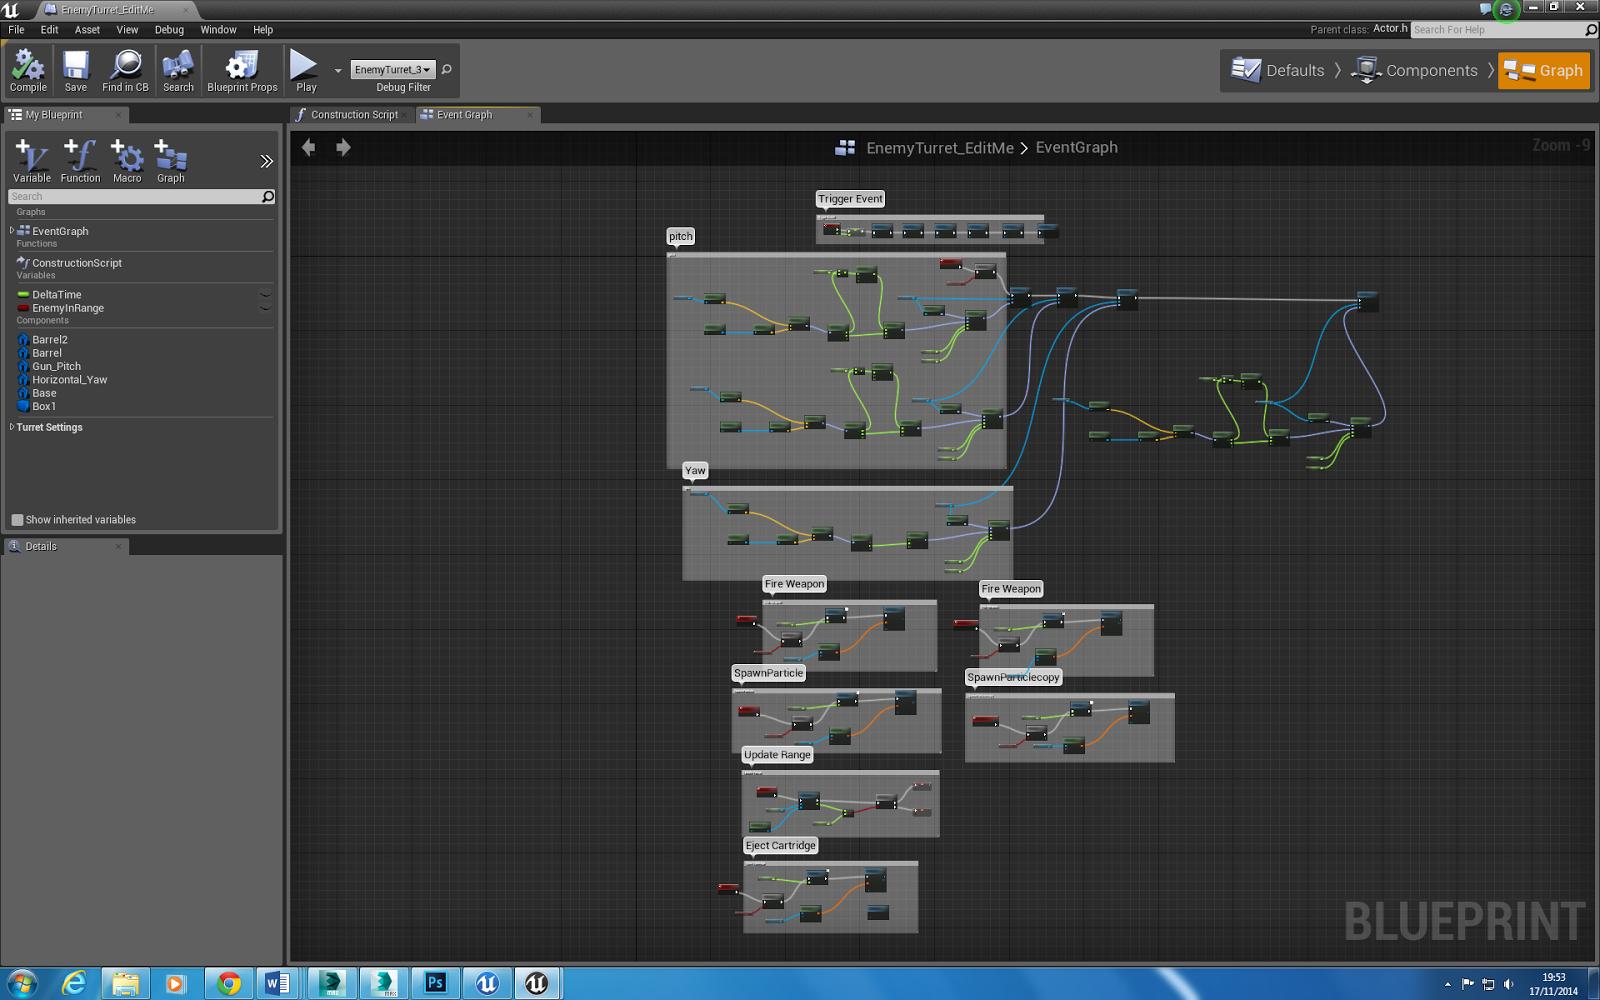
Texturing was reasonably simple, but I was using a new map, an emissive map, which is a map that masks out the non-glowing parts of the texture so only the correct parts glow. This was simple but plugging it in, getting it to look right was another matter.

Introducing Freddy to complicated texture blueprints in engine was also not a simple task, but we got through and I now understand a lot more about PBR.


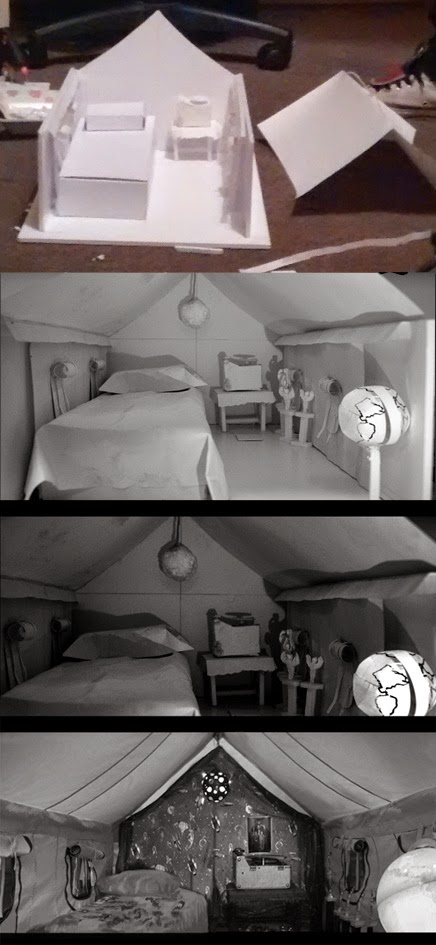
Least we forget the paper model, a hallowed construct of paper and love. This was something that we put a lot of effort into, although not much time and it somehow came out the other side looking pretty good.

I love it because it’s cute and it was a lot of fun to do together. However It was really successful too, it matches the scene well and we faced similar camera issues with the physical model as we did with the engine one. Because of the focal point of the globe, the lens wants to focus on it or the back, and not both. 

To create the photo of our model I took it on my DSLR, so I could fiddle around with differential depth and then composited two successful shots into one.


Overall I’m chuffed about how well we worked as a group, I’ve learned an incredible amount about engine, group work and most importantly I’ve taken on all these mistakes and learnt from them. I may have changed parts with time, I may have not produced my best work ever but I learned so much and I’m at uni to learn.


There is no failure in mistakes, failure is not learning from them.

Saturday 15 November 2014

Week 3

The Film Room Post Mortem part 1

Now the Project is over, I can present the film room project, a deadly viper assassination squad production.

Our group started by looking into films and rooms we liked, many were colourful, high contrast and busy rooms. We soon realised most would be very challenging.
We created a mood board of the rooms we liked, the rooms we thought were reasonable and the films that had good art direction for us to study.


However it became clear after our first pitch that the rooms we had chosen may have been too busy and too complicated for the short deadline we had.

Our very first moodboard


My revisited moodboard
Our next pitch was in 1 week so we had to get working quickly to find the room that would be colourful, have good lighting and also be simple enough to model in just over 2 weeks!
To get the ball rolling I made the above mood board of films and rooms I liked. I then set off the rest of my group to do the same and cracked the whip so we could decide and get some concepts and white boxing done for our second pitch.

Speed runner
Broken Embraces
My paintovers

We all did over-paints of scenes to decide which were the most effective without people and which still had really good composition after removing actors.

I started with tonal studies to find the scenes with the best lighting and composition, it really helped find the rooms that were boring without colour.

I really like the staircase but we all decided the tent was the most visually appealing to all of the team. 


This was our final mood-board for our second pitch, it shows the back-up rooms including our final choice, the tent from The Royal Tennebaums.